
USING A MICROSCOPE
I have worked with compound microscopes in my physiology and microbiology classes and they are a great tool in the science world!! I will start by explaining the mechanical parts of the compound microscope. First, is the ocular lens. These are similar to looking through binoculars because they both have magnification. To turn the microscope on there is an on/off switch that allows the light to come in. You must also turn the rheostat to 10 which is next to the on/off switch at the base of the microscope. Any other light adjustment will be done by the iris diaphragm. The ocular lens on the microscope has a magnification 0f 10x, so if have a specimen on the stage of the microscope (where slides go) and looked through the ocular lens it would be magnified ten times. You must look through the ocular lens to adjust the viewing of a specimen. To do this, place your fingers around the ocular lens's, while looking through them, twist to bring the double circle into one. You should not see two circles; otherwise viewing your specimen could b very difficult. Secondly, is the objective lens located on the nose piece, below the ocular lens. The ocular housing changes the objective lens, in which there are four. The ocular housing can be turned and brought over the slide on the stage of the microscope. The four lens consist of a scanning lens with 4x magnification, low power 10x, high power 45x, and oil immersion 100x. To find out your TOTAL magnification, you must multiple the ocular lens (10x) times your objective lens. EXAMPLE: 10x (x) 4x = 40x total magnification. The microscope contains a stage for a specimen, which is flat and located right under your objective lens. It has a spring loaded clip which you pull to place your slide, then let go when it is securely in place. After placing a specimen on your stage you need to bring it into focus using two knobs. One knob is the coarse focus knob located on the left side of the microscope (it is larger then the fine focus knob). The coarse is used to move the objective lens towards and away from the specimen. It moves the stage rapidly. You can be looking through the microscope while using the coarse focus. The next knob is the fine focus which is directly next the coarse focus knob. The fine focus knob is used to bring the specimen into a crystal clear image. You must be looking through the ocular lens to bring the specimen into optimum view. The coarse focus must be used before using the fine focus because it brings the specimen closer to the objective lens you are using. Along with focus knobs there are the XY control knobs that bring your specimen into the center of for viewing. You must be looking through the microscope to accomplish this. To bring light onto the specimen you will need to adjust the iris diaphragm which is located under the stage. You should be looking through the ocular lens while turning the lever of the iris diaphragm back and forth. It brings the light through the condenser. These are the important mechanical devices on the compound microscope.
The microscope is a very important tool in the scientific world. It allows scientists to view specimens that they cannot see with the naked eye.
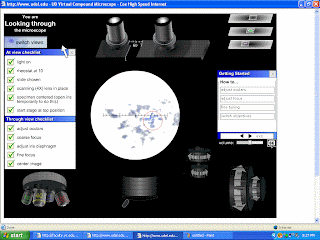
While viewing the simulator, I choose the cheek cell as the slide I wanted to view. What you are seeing is a view through the microscope of a cheek cell and the mechanical devices which I described above.

The microscope was founded by Hans & Zacharias Janssen who were Dutch eye glass makers in 1595. The first microscope they made was just a tube with lens at each end and their magnification was 3x to 9x. Robert Hooke improved the compound microscope with his abilities as an engineer in 1660’s. He designed (not built) the mechanical devices for the microscope. Then there was Anton Van Leeuwenhoek who was a brilliant man with many talents. He made microscopes with one lens. He was the first person to build a microscope. He described protozoans, cheek cells, and proved the theory of blood circulation. This is a picture of Leeuwenhoek first microscope.

His microscope was very hard to use because it was so small.
Microscopes have many uses. They are obviously used in laboratories, hospitals, research center, and many, many, more facilities. As I said before the importance of a microscope is the fact that scientist can see specimens that they can’t see with the naked eye. The microscope also helps scientist identify new bacteria’s. There are millions and millions of bacteria that we haven’t even identified yet, but little by little they are being worked on. There are different kinds of microscopes. As I talked about above, the compound microscope is used mainly for glass slides and uses light. It is also two dimensional. This is the most used microscope.
Another microscope is the dissection microscope, which as the name applies, is used to view small animals; such as frogs. This microscope, unlike the compound microscope, when viewing a specimen it isn’t upside down. It is looking right back at you. It only has one objective lens so viewing is limited.
The scanning electron microscope uses electron illumination, instead of light. These microscopes scan the surface of a specimen. Finally, the transmission electron microscope also uses electron illumination and gives a 2-D view of a specimen. This microscope actually slices through a specimen for viewing.
Conclusion: The microscope is an amazing piece of equipment and has been around a very long time!!
ß----Scanning electron microscope


